What to watch for
Attacks
Raises its shield and uses melee, returning axes and arcing axe throws.
Combat suggestions
Watch the switch between guarding and attacking; keep track of melee threats as well as axes.
Attack information comes from game data; the approach advice follows those attack patterns. Use the direction and range of each attack to choose when to move.
What can it drop?
Shared drops
Form 1, Form 2, Form 3 use the shared drop table.
- Mana balls
- Mana recovery drops; equipment can modify the amount received.
- Random recovery items
- Meat chunk, Mana tea, Health potion.
Recovery items are random drops. The table lists the items that can be selected; defeating an enemy does not guarantee every item on the list.

Forms & base rewards
 Full-size image ↗
Form 1
- Base HP
- 1000
- Base XP
- 440
Shared drops: mana balls and random recovery items.
 Full-size image ↗
Form 2
- Base HP
- 1500
- Base XP
- 440
Shared drops: mana balls and random recovery items.
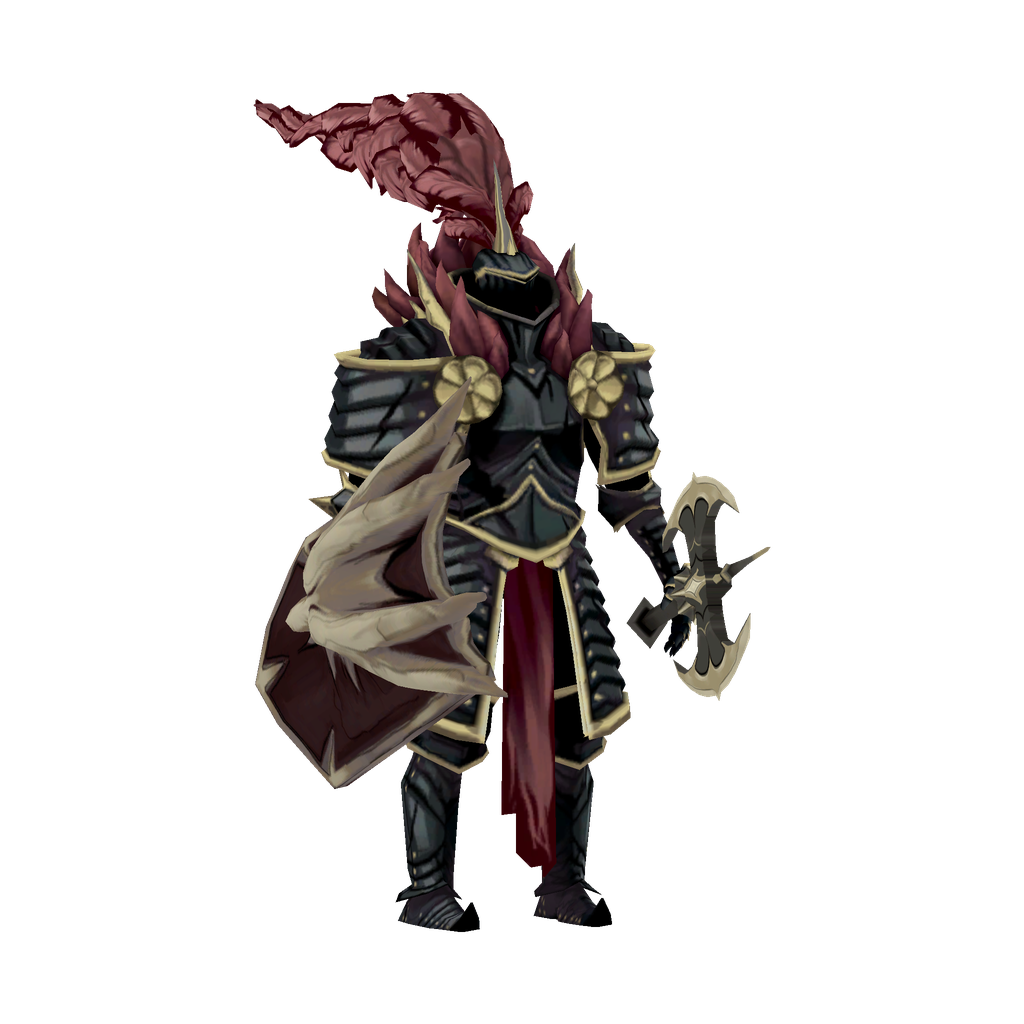 Full-size image ↗
Form 3
- Base HP
- 2000
- Base XP
- 500
Shared drops: mana balls and random recovery items.
Images are game-model renders. The table shows base health and XP; difficulty and equipment effects affect combat calculations. The pre-encounter following phase is separate from combat forms and has no kill rewards.
Where can I find it?
Highlighted areas locate rooms where this enemy appears during the game; encounters depend on your current progression. Choose a room below to find it on the interactive map.
Notre-Dame
Gold: rooms with recorded appearances
Choose from 9 rooms
- Narthex ↗Form 1
- Chapel of Patience ↗Form 1
- Nave ↗Form 1
- Sealed Scriptorium ↗Form 1
- Tomb of the Chevaliers ↗Form 1
- East Triforium ↗Form 2
- East Gallery ↗Form 3
- Path of the Penitent ↗Form 1
- Justice of Emmanuel ↗Form 3
Clock Tower
Gold: rooms with recorded appearances
Choose from 4 rooms
- Bridge of Haste ↗Form 1 / Form 3
- Eastern Summit ↗Form 1 / Form 3
- The Gauntlet ↗Form 1 / Form 3
- Eastern Summit ↗Form 1
Hall of Mirrors
Gold: rooms with recorded appearances
Choose from 11 rooms
- Boudoir of Bewilderment ↗Form 3
- Delived Level ↗Form 3
- Steps of Misdirection ↗Form 3
- Passage of Perplexity ↗Form 3
- Corridor of Déjà Vu ↗Form 3
- Chamber of Secrecy ↗Form 3
- Glass Gallery ↗Form 3
- Threshold of Vision ↗Form 3
- Looping Hallways ↗Form 3
- Nightmare Atrium ↗Form 3
- Hall of Mirrors Entrance ↗Form 2
Master's Quarters
Gold: rooms with recorded appearances
Choose from 2 rooms
- Sanctuary of Solitude ↗Form 2
- Master's Bridge ↗Form 2
Official gameplay reference