Start with the figure and six points
Each globe has six surrounding points. Match the figure at its centre, then follow one of the four-point paths below. Left and right mean screen directions. Stay airborne until all four different targets are active; touching one twice adds nothing. If the attempt fails, land and start the four targets again. Completing a Planetarium globe unlocks a stronger bounce above it.
Man: the four lower points
Bounce from middle left to lower left, lower right, then middle right. Leave both upper points untouched. The Star Chart in the Astronomer’s Office shows this pattern. The reverse path also works; it is the four connected targets that matter.
Woman: cross from upper left to lower right
Bounce from middle left to upper left, lower right, then middle right. Avoid upper right and lower left. Use a purple whip anchor where available to cross without landing or adding an unwanted point. Organic Astrology in the Drawing Room provides part of this pattern; combine its head and hand markings with the nearby wall illustrations. This clue belongs to the globe puzzle.
Skeleton: upper right and the right-hand arc
Start at upper right, then bounce through middle right and lower right, finishing with a long jump to middle left. Avoid upper left and lower left. The same four points also work in reverse. Look for the constellation in the Natural Philosophy Shelves window to compare the pattern.
Take the new bounce toward the Observation Tower
After each globe activates, use the new bounce point above it and continue upward with the whip anchors. Apply the matching figure’s pattern again when another globe appears. The ceiling route leads to the Observation Tower and then the Observatory, where Carmilla waits. Her battle, reward orb and the Aerial Rush tutorial are separate steps; follow the linked guides after reaching her.
Solution diagrams
Numbers show one usable path. Crosses mark the two points to avoid. Match the central figure before following a diagram.
Man
Woman
Skeleton
Patterns and mirror destination checked against game data; external gameplay references are linked below. These are diagrams, not screenshots recorded by this site.
Gameplay references:SPACE4GAMES ↗ · T-Pose Gaming ↗
Original clue illustrations
Star Chart
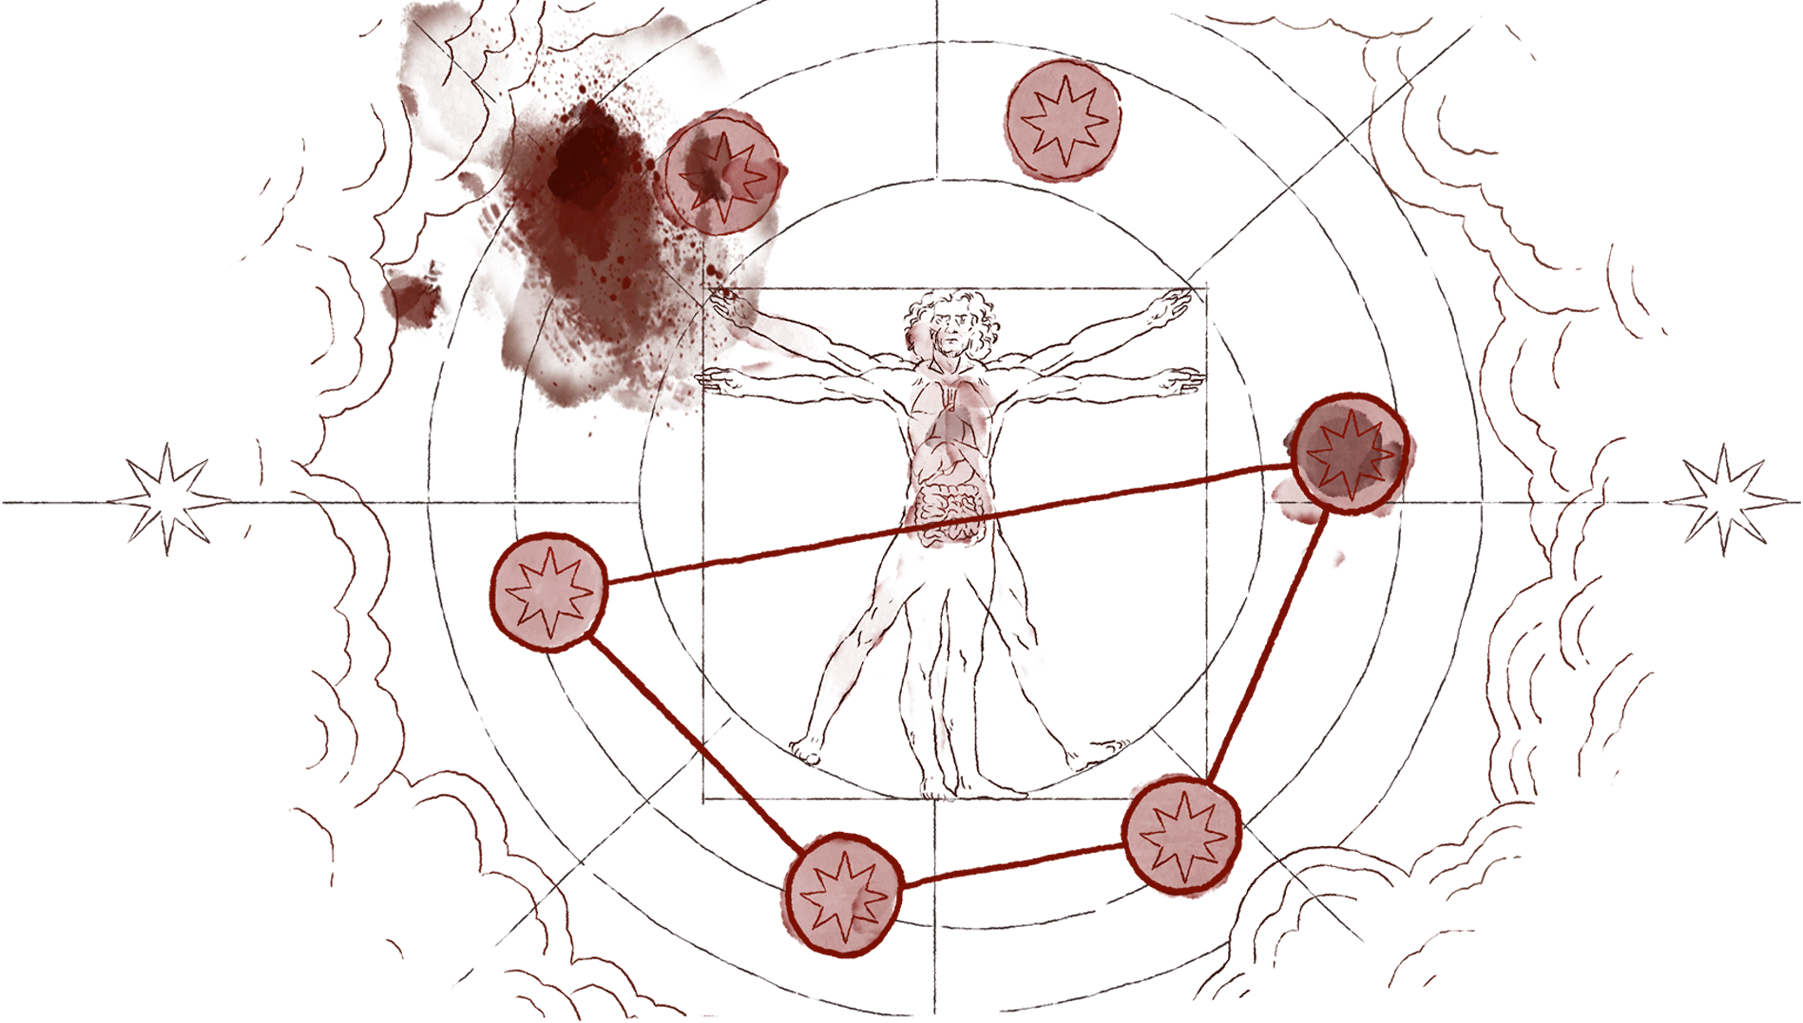
Original in-game clue artwork; open it to inspect the full-size image. This is an illustration, not a scene screenshot. Clue and location →
Organic Astrology
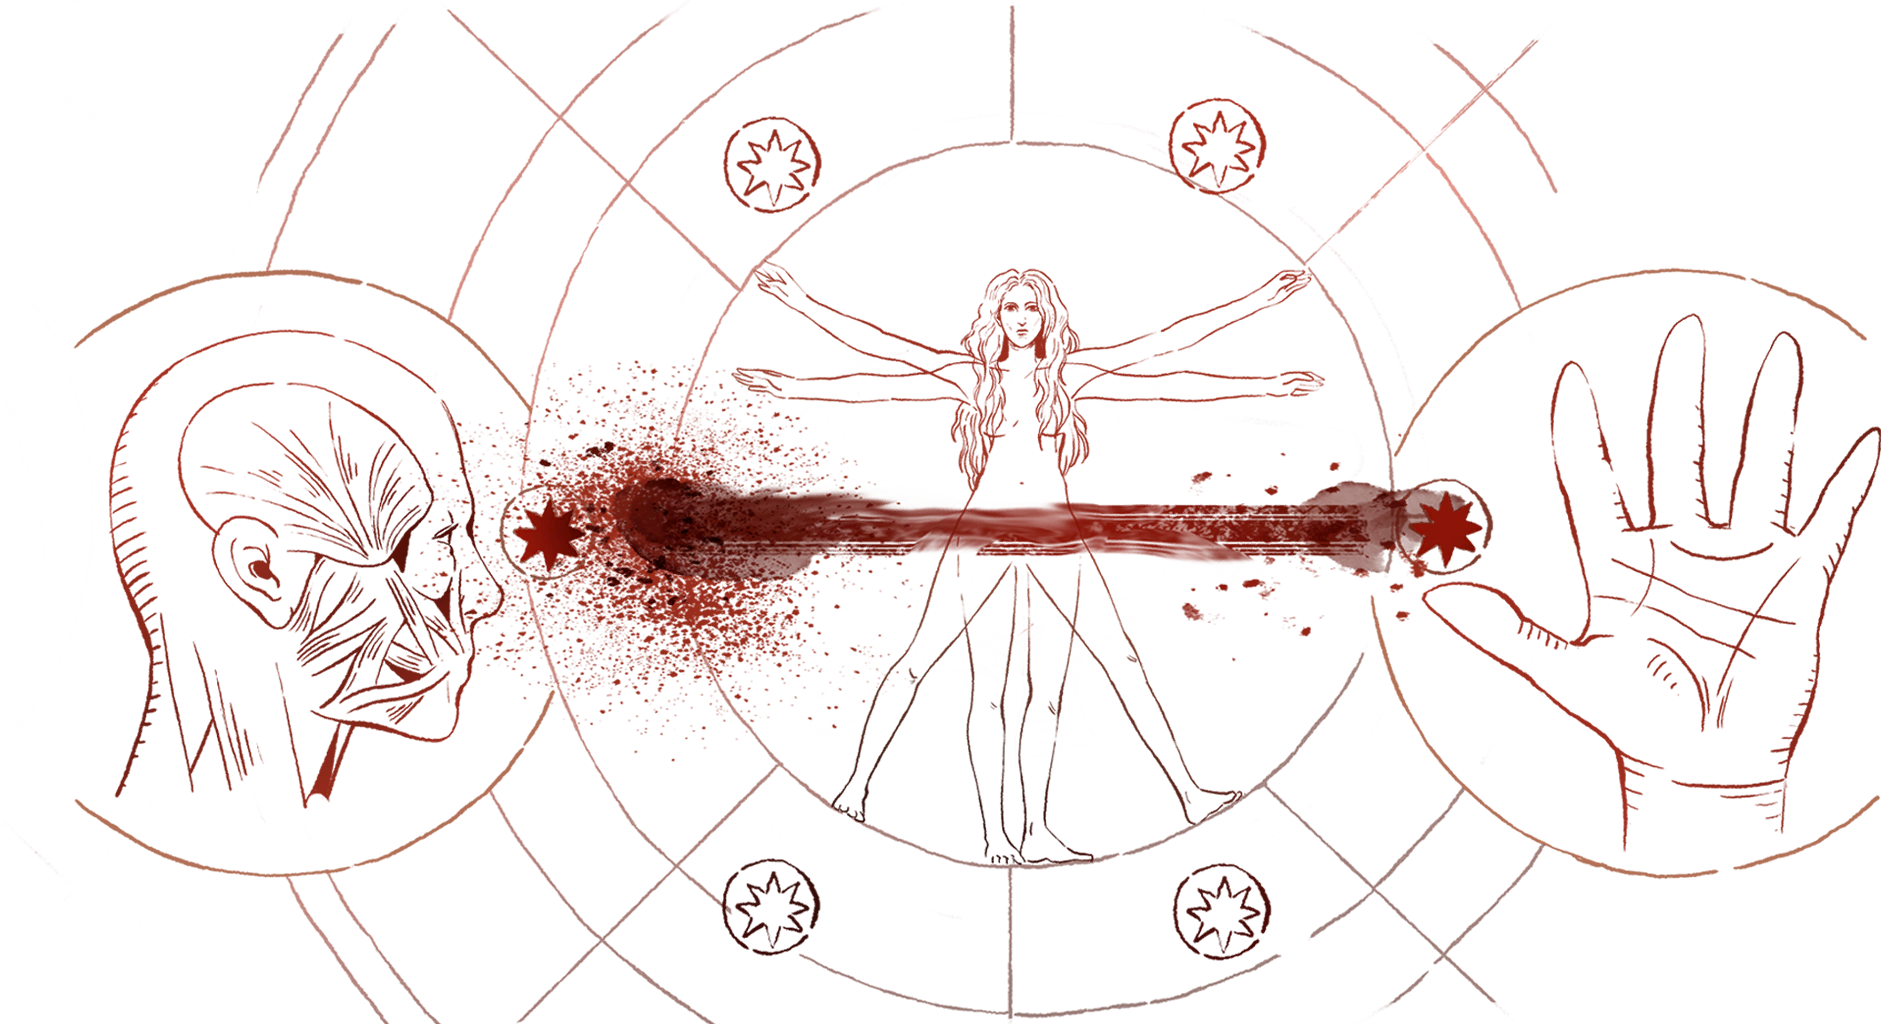
Original in-game clue artwork; open it to inspect the full-size image. This is an illustration, not a scene screenshot. Clue and location →
Find each stage on the map
Select a stage to highlight its room. These references locate the places described above; they do not show every jump or prove a continuous accessible route.
- PlanetariumLibrary / Planetarium ↗
- Star ChartLibrary / Astronomer's Office ↗
- Organic AstrologyLibrary / Drawing Room ↗
- ObservatoryLibrary / Observatory ↗
Linked items, clues and powers
- Star Chart →
Research notes identify a celestial alignment as part of the ritual.
- Organic Astrology →
The chart pairs Mercury with lungs and Jupiter with liver, and leaves a question mark for blood’s celestial body.
- Carmilla →
Carmilla is in Library.