How do you start the portrait challenge?
Go to Level Deviled in Hall of Mirrors and use the challenge interaction to the left of the Vampire Lord’s portrait. Starting it closes the room’s gates and begins the enemy waves. Restore your health and arrange your equipment before committing to the interaction.
The challenge point and Bernhard’s Wrath reward use the same area. Before the fight you activate the challenge; after completing it you use the reward interaction. An equipment marker alone does not mean the weapon can already be claimed.
Which enemies appear in the three waves?
The first group contains two Spear Guards, one Peeping Eye and one Beam Skeleton. The second contains one Ruler Sword and two Axe Armors. The third contains one Peeping Eye and two Werewolves. The wave table below links each family’s attacks and the exact documented forms.
Each group must be cleared before the next one is started. Defeating one nearby enemy does not finish the current wave while other members remain. When the arena seems quiet, check both the floor and the space used by the eye or beam attacks.
How should you prepare for the changing groups?
As an equipment-planning suggestion, prepare for both mobile close-range enemies and ranged pressure. Keep enough space to leave a beam lane, and avoid spending all your recovery resources in the first group when two groups still follow.
The enemy links describe the actual families in this challenge. Check the eye’s combat form, the skeleton’s beam and the werewolf’s approach instead of assuming every wave is handled like the first pair of guards.
Why is the weapon still missing after the enemies die?
Clearing the final group reopens both gates and enables the reward interaction. Return to the reward point and interact to receive Bernhard’s Wrath. The gates opening and the weapon being collected are separate steps.
Bernhard’s Wrath heals through successful fist attacks at its charge stages. Use the fist-charge guide for the 1/4/9 charge thresholds, the four-second interruption and its 1%/2%/3% maximum-health healing. This guide covers obtaining the weapon; that companion guide explains using it.
Three-wave enemy reference
Open an enemy to compare its attacks and the listed form. The forms below identify combat enemies in this challenge.
| Wave | Enemies | Next step |
|---|---|---|
| 1 |
| Defeat every member to start the next wave. |
| 2 |
| Defeat every member to start the next wave. |
| 3 |
| Both gates reopen; return to the reward interaction. |
Find each stage on the map
Select a stage to highlight its room. These references locate the places described above; they do not show every jump or prove a continuous accessible route.
- Find the portrait challenge in Level DeviledHall of Mirrors / Level Deviled ↗
Effects and acquisition locations
Open an entry for its controls and acquisition conditions. A room reference highlights the whole room; a character link identifies the reward encounter.
Swipe the table sideways to see acquisition locations.
| Equipment or power | Effect | Acquisition |
|---|---|---|
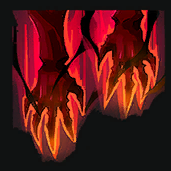 Bernhard's Wrath Bernhard's Wrath | Longer combos can restore the wielder’s health. | Hall of Mirrors / Level DeviledMap location ↗ |