What does Gloomstone reveal?
Gloomstone provides a hint when Rose is near a hidden location. Treat the reaction as a reason to inspect nearby walls, floors and mechanisms. It does not perform Smash, supply a missing key or replace the interaction needed to open the hidden route.
Select the nearby hidden area on the atlas to compare its outline and any linked lever or gate. A hidden-area outline describes an area to inspect, rather than an exact reward pickup. For a known mechanism, follow that location’s own action steps.
Which relic helps with backtracking?
Sand Charm gives 35% more movement speed for 30 seconds after resting or using the Ferryman. Hollow Bone gives 35% for 5 seconds after grappling an anchor. Mourning Bead gives 35% for 7 seconds after defeating an enemy. Pick the trigger your intended route supplies naturally.
For a journey starting at a mirror or wharf, finish your equipment preparation before departure. Anchor-heavy rooms favour Hollow Bone’s trigger; rooms with enemies supply Mourning Bead’s trigger. These comparisons describe when each effect applies, without assuming that equal bonuses stack.
Why do enemies return when I leave a room?
Phantom Ring resets a room’s enemies when you leave, without requiring a rest first. If a cleared room repopulates during a short return trip, check whether this relic is equipped. For a quiet search for a wall or lever, consider leaving it unequipped while you inspect the room.
The effect concerns enemies. It should not be read as a promise that chests, books, heart fragments or experience statues refill on every exit. Use ordinary enemy rooms when planning repeated combat; collectible locations remain separate targets.
How do I use Moonlit Shard’s XP bonus?
Moonlit Shard gives 20% extra experience for defeating enemies while at full health. The condition applies when the enemy is defeated; a large but partly depleted health bar is insufficient. As a route-planning suggestion, recover before entering a room where you intend to fight.
Use the enemy directory to compare each form’s base experience and room locations. The links identify whole rooms. They provide a way to choose targets, rather than a measured fastest-leveling route or a guarantee that every enemy belongs to the same respawn rule.
Effects and acquisition locations
Open an entry for its controls and acquisition conditions. A room reference highlights the whole room; a character link identifies the reward encounter.
Swipe the table sideways to see acquisition locations.
| Equipment or power | Effect | Acquisition |
|---|---|---|
 Gloomstone Gloomstone | Signals that a hidden area is nearby. | Master's Quarters / Sanctuary of SolitudeMap location ↗ |
 Sand Charm Sand Charm | Resting or using the Ferryman grants 35% extra speed for 30s. | Hall of Mirrors / Servants' RefectoryMap location ↗ |
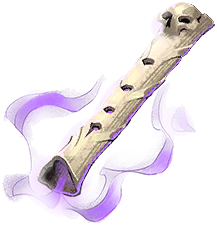 Hollow Bone Hollow Bone | Grappling an anchor grants 35% extra speed for 5s. | Clock Tower / Daedalus CrossingMap location ↗ |
 Mourning Bead Mourning Bead | A kill grants +35% movement speed for 7s. | Catacombs of Paris / Path of the AbyssMap location ↗ |
 Phantom Ring Phantom Ring | Leaving a room resets its enemies without needing a rest. | Clock Tower / Western AscentMap location ↗ |
 Moonlit Shard Moonlit Shard | Kills made at full health yield 20% extra experience. | Clock Tower / Path of the BuilderMap location ↗ |