Which Death encounter are you trying to finish?
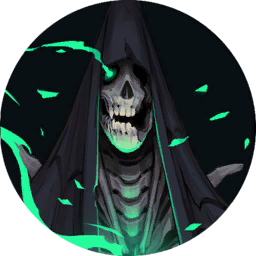
Death is involved in an earlier encounter at Bone Altar in the Catacombs and a later boss encounter in Notre-Dame. Keep those destinations separate when following a map link. The earlier fight and subsequent story sequence unlock mirror passages at nine Mirrors of Life across Paris, the cemetery and the Catacombs; each passage still requires using its own Mirror of Life.
The later fight is the reward encounter associated with The Shadow and Soul Harvest. If you are looking for that spell or for the route onward after the fight, use the Notre-Dame boss reference below. Seeing Death earlier in the story should not be treated as proof that the later reward has already been claimed or that every linked exploration action is ready to use.
Prepare for two different sets of health thresholds
Death’s scythe-chain checks use remaining-health thresholds around 85%, 65% and 30%. The bullet-hell checks use around 50% and 10%. These are two sets of special-attack conditions, not five replacement health bars. In practical terms, conserve movement space and recovery options as the bar approaches these points instead of assuming that the opening attacks describe the whole fight.
Crossing a threshold makes the relevant attack eligible; it does not establish an exact frame on which it must start. Continue watching the current sequence. Around the final portion of health, leave enough resources to answer the next bullet-hell sequence before attempting a finish. Trying to trade through an expected last hit can be a poor bargain if another special attack is about to follow.
Read the attack before choosing a direction
Death’s attack selection includes teleports, scythe chains, scythe attacks and bullet-hell pressure. After a teleport, locate the boss and the new threat before repeating your previous movement. A useful learning approach is to keep attacks short until you recognize where a sequence ends. Do not assume that a spell which worked against an isolated scythe will also make an entire chain safe.
For positioning, try to preserve a way out of the space Rose currently occupies. Reconsider that route whenever the boss teleports or the projectile pattern changes. This is a movement-planning suggestion rather than a universal safe spot. If you need healing, choose a moment based on the attacks still in play; the health percentage by itself does not tell you that the screen has become safe.
Claim the rewards and check the separate tutorial
After the Notre-Dame encounter, interact with the reward orb to claim The Shadow and Soul Harvest. Double Jump has a separate tutorial and unlock reference, so open its ability entry and complete that step as well. Boss room, reward claim and ability tutorial identify different actions; collecting the card should not be your only check when deciding what became available after the fight.
Soul Harvest is also used at the Cursed Horologium in Clock Tower. Equip it before interacting with the mechanism to disarm the false-route trap. Interacting again re-arms that trap, so leave it disarmed before proceeding toward the real Master’s Quarters. Use the endings guide to connect this action with the four virtues and Absolution instead of treating the boss victory alone as the ending condition.
Questions players ask
Are the listed percentages damage dealt or health remaining?
They refer to Death’s remaining health. The scythe-chain and bullet-hell groups use different thresholds. Use them to prepare for a change in pressure, while continuing to watch the actual attack; they are not instructions to stop responding at a particular point on the bar.
Why did a special attack not start immediately at the threshold?
The health check establishes eligibility, while the encounter still has its current actions to handle. It is not a fixed-frame promise. Keep your position and resources ready, and read the next attack when it begins rather than assuming the displayed percentage has created a guaranteed opening.
I fought Death at Bone Altar; where is Soul Harvest?
The spell belongs to the later Notre-Dame reward encounter. The earlier encounter has its own story and mirror-passage result. Follow the correct boss reference, then complete the reward-orb interaction after that fight before checking your spell equipment.
Why is the Cursed Horologium trap active again?
That interaction toggles the trap. After equipping Soul Harvest and disarming it, another interaction can re-arm it. Check the state before leaving for the next part of the ending route; repeating the interaction is not an extra reward claim.
Find each stage on the map
Select a stage to highlight its room. These references locate the places described above; they do not show every jump or prove a continuous accessible route.
- Bone Altar: the earlier Death encounterCatacombs of Paris / Catacomb Entrance ↗
- Notre-Dame: the later Death reward encounterNotre-Dame / Choir ↗
Linked items, clues and powers
- Death →
Death is in Notre-Dame.
- The Shadow →
Soul Harvest: A heavy scythe strike releases 4 extra sickles from each defeated enemy.
- Soul Harvest →
A heavy scythe strike releases 4 extra sickles from each defeated enemy.
- Double Jump →
Gain a second jump while airborne.